The Best Strawberry Bread Ever!


Warm strawberry goodness sounds pretty good right about now! A friend suggested I share this recipe with y’all again – just in case you’d missed it the first time (2 years ago)! I wouldn’t want anyone to miss out on this one, it makes Winter a little more “bearable” by giving you a taste of Spring – something we could all use right about now!    😉  

This is some of the moistest, most amazing Strawberry Bread you will ever eat. Smothered with a Cream Cheese spread, it is a little slice of Heaven – and you don’t even have to use fresh strawberries to make it! Good eats at any time of day – breakfast, snack, dessert – doesn’t matter! Just be sure to stash it where it’s not in open view when you are not around – otherwise it will be all gone when you come back for seconds!!  😉 

Very easy to make with only a few ingredients required, and about an hour of your time, makes this a quick and scrumptous treat!

Shady’s Southern Strawberry Bread

*Makes 2 Loaves

Preheat oven to 325 Degrees

2 sticks butter

1  1/2 cups sugar

4 eggs – lightly beaten

1 cup strawberry jam or preserves

1 cup sour cream

3 cups flour

1/2 tsp. baking soda

3/4 tsp. cream of tartar

1 tsp. lemon extract

1 tsp vanilla extract

Line 2 loaf pans with wax paper and set aside. You can trim the paper down to fit the pans better – just make sure that you leave enough “overhang” to be able to grasp and  lift the loafs out of the pans when they are done!

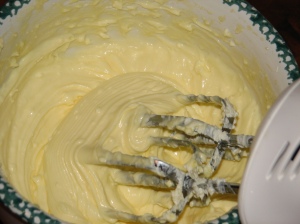
In a large mixing bowl, cream your butter, sugar and eggs together.

In second mixing bowl, fold sour cream into jam.

In third mixing bowl sift flour, baking soda and cream of tartar together.

Now, add the flour mixture  ( 1/3rd at a time)  to the butter mixture while alternating with the jam mixture while mixing on LOW speed.

Now fold in the lemon extract and the vanilla with a spoon.

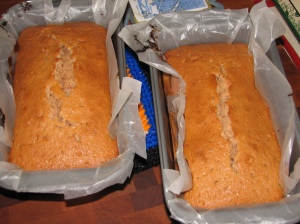
Pour into wax paper lined loaf pans – dividing batter evenly between pans, and place in preheated oven at 325 degrees on middle rack of oven. Bake for 1 hour. (Don’t worry – the wax paper WON”T burn, and it IS necessary for the success of this bread)  

While bread is baking make Cream Cheese Spread – if desired:

Cream Cheese Spread

1 pkg (8 oz.) softened cream cheese

1/2 cup milk

 1/2 cup powdered sugar (can up this to 3/4 cup if sweeter, thicker spread desired)

1/2 tsp vanilla extract

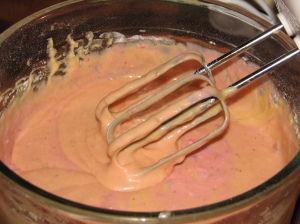
Mix all together on Med-High speed until well blended. Place in fridge until ready to use. (Please forgive my stained bowl – it’s around 17 years old and has been well-used)  🙂 

Now – when baking time is done, insert a toothpick into the centers of the loaves and check for doneness – it will come out clean when they are done. Remove loaves from oven, set pans on trivets or wire racks to cool for 5 minutes, then lift loaves out of pan by wax paper.

Peel off wax paper, slice loaves into hunks about 1/2 to 1 inch thick, spread with Cream Cheese spread (if desired – if not butter or plain is yummy too)!!

However – BEWARE – a hand will “magically” appear and snatch the first plate of strawberry goodness away before you even get done plating it all up!!

Guard the rest of the loaf wisely young grasshopper, guard it wisely!!!!

Enjoy!!  🙂 

Shady


BBQ Pulled Pork or Beef

Okay, I know this is not a traditional Pulled Pork recipe. However, sometimes you need to “fudge” on long-cooked items for today’s crazy lifestyles. This is my “I-Don’t-Have-Time-To-Do-It-The-Way-They-Say-To” Pulled Pork recipe so that you can throw it on before you leave for work, and have dinner ready when you get home. Shhhh – just don’t tell them you cooked it this way and “they” will never know!!  ;)   

Here’s what you need to do:

Grab your Crock-pot, plug it in, set it on LOW.

Grab a 4 – 6 LB FROZEN  Pork Roast out of your freezer, unwrap it, throw it in Crock-pot. Sprinkle on some Garlic Powder and lots of Black Pepper.

Grab a bottle of BBQ Sauce outta the cupboard and dump it over Roast, Refill bottle 1/4 full of WARM or Hot water, swish around to clear bottle, and dump it over Roast.

Now cover crock-pot and walk away. In 8 hours you will have a Falling-Apart, Melt-In-Your-Mouth BBQ’d Pork Roast! 

Now take Roast out of crock-pot and place into a large mixing bowl. Take 2 large forks and pull roast apart – at this point it will fall almost completely apart on its own!!!

Now, you have 2 options – you can either dump the BBQ sauce cooking mixture back over roast and stir to serve – OR – take a new bottle/batch of BBQ sauce and pour it over the shredded meat, mixing in well (I prefer the later method since the sauce the meat cooked in is a bit “watery” at this point, but either method works well! I then use the sauce that is remaining in the crock-pot as gravy for smashed potatoes that I serve on the side of this dish – sounds weird, but tastes GREAT!!). 

Now, scoop meat out of the bowl onto buns for Pulled Pork Sandwiches!

Enjoy! 

Shady

P.S. This also works for BBQ Beef  for sandwiches as well – same instructions, just a different meat.  ;)

P.P.S.  This is an awesome recipe for the “Game Day” buffet. Just return the shredded meat/bbq sauce mixture to an empty (no cooking liquid remaining) crock-pot,  and set crock-pot to “WARM” or “LOW” once you reach your destination to watch the game.  Just be sure to stir the meat every so often while watching game so the sauce doesn’t burn to the sides of the crockpot.    🙂

Chocolate Treasure Cupcakes

Okay – who’s ready for a massive chocolate fix????

This kind of warm, gooey chocolate fix???

Mmmmmmmm……Cheesecake middles…….

Well then, here you go:

Chocolate Treasure Cupcakes 

preheat your oven to 350 degrees 

prepare muffin tins for 24 cupcakes (either use liners, or grease and sugar; or grease and cocoa powder – if you REALLY love chocolate – the tins) 

Filling: 

1 – 8 oz. pkg softened cream cheese 

1 egg, beaten 

1/3 cup sugar 

1/8 tsp salt 

1  (6 oz.) pkg semi-sweet chocolate chips (1/2 a regular size pkg) 


Combine cream cheese, egg, sugar and salt. Beat with mixer on medium speed until well blended. 


Now stir in chocolate chips, using a spoon. Set aside for later. 


Cupcake Batter: 

3 cups flour 

1/2 cup cocoa powder 

2 cups sugar 

2 tsp baking soda 

1 tsp salt 

2 cups water 

2/3 cup vegetable oil 

1 tblsp white vinegar 

2 tsp vanilla extract 

Combine first 5 ingredients (dry team) in a large mixing bowl. 


Mix thouroughly – I use a whisk for this part. 


Assemble the rest of the ingredients (wet team). 


Now, SLOWLY add (in order) water, oil, vinegar and vanilla while mixing on LOW speed with electric mixer (otherwise you will be consumed in a dust cloud of chocolate…..sounds good, breathes bad).  🙂  Mix well. 


Now, fill cupcake tins 2/3 full of Batter, then drop heaping teaspoons full of cream cheese Filling in center on top of batter. Don’t worry – it will sink into batter while it bakes.  😉  


Arrange pans on center oven racks so that they are not touching. 


Bake at 350 degrees for 30 – 35 minutes. 

Remove from oven and place on trivets or wire racks to cool before removing cupcakes from pans. 


You must let them cool a bit before eating – you don’t want to hurt yourself! But, most importantly of all…….BEWARE that blasted Hand Monster thief!! 


Because you are going to want all of this yummy goodness for yourself!!! 


Although, in order to avoid possible over-consumption and extra “jigglies” where you don’t want them, you MIGHT want to consider sharing….. Notice I only said “might” though.  🙂   

Enjoy!! 

Shady

My Breakfast Casserole

I origionally posted this recipe last January – but considering the cold/nasty weather conditions that most of us are experiancing, I thought you might like to try this out this weekend.    🙂


This recipe can be made with ANY cheese you have on hand, and it’s awesome for ANY meal – not just breakfast!!

Enjoy!    🙂  


Shady’s Breakfast Casserole


Breakfast Casserole

Easy Breakfast Casserole


(Approx. one hour from start to finish)

Oven set to 350 degrees, rack in center of oven

9 x 13 glass baking dish

non-stick cooking spray

2 LBS sausage – spicy is best (or 1 lb sausage, 1 lb hamburger, or 1 lb pork sausage and 1 lb turkey sausage – any combo will work)

12 eggs

2 cups milk

2 cups +/-  cubed bread/ stuffing mix (unseasoned works best)

5 slices taco cheese (deli cheese…can substitute any cheddar) crumbled

5 slices Chipolte cheese (can substitute pepper jack) crumbled

12 thin (1/4 – 1/2 inch thick) slices of Velveeta cheese

1/2 tsp. Paprika

1 tsp Italian Seasonings

1/2 tsp Black Pepper

1/4 tsp. Garlic Powder


Brown sausage in skillet (approx. 20 min over med. heat) DO NOT DRAIN, most of grease will cook off and you need what is left for the bread cubes.

While meat is browning;

 preheat oven, spray baking dish, place bread cubes in bottom of baking dish 1 layer deep only, set aside.

Whisk eggs, milk and spices (like making scrambled eggs) and set aside.

Crumble up cheeses and slice Velveeta, set aside.

Once meat is browned pour meat and any remaining pan drippings over bread cubes and level out. Next, place crumbled cheeses over meat. Now Pour egg mixture over top of that. THEN place velveeta slices on top (if you pour the eggs over the velveeta you will have a black, burned top).

Place in oven on center rack – UNCOVERED for 30 – 35 min. at 350 degrees

Let cool 10 – 15 min before eating or the cheese will burn you.

ENJOY!!! Serves 8 – 13 people, or makes GREAT leftovers for the next few days :)   Reheat individual servings in microwave for approx. 1 min 15 sec.


Homemade Butter and Buttermilk

Here’s a recipe for you to make your own (flavored or unflavored) Butter and Buttermilk. 

With butter (and esp. flavored butter) prices going thru the roof, I thought I’d share this one with you to help stretch your grocery dollars a bit farther.    🙂   

Sorry for the lack of photos  – my camera wasn’t around for this one.    🙂


HOMEMADE BUTTER AND BUTTERMILK

 
2 pints heavy whipping cream


Leave the cream out for 12 hours before making the butter.

Put the mixing bowl and beaters for your mixture into the freezer for a half hour before you make the butter.


Pour the cream into the mixing bowl and beat until the cream turns yellow and clumps, and the liquid separates out. This is buttermilk! Don’t leave the mixer unattended or when that separation happens the buttermilk will splatter all over your kitchen!!!

Pour the buttermilk into a container and save for another use.

Pour the butter into a cheesecloth-lined strainer. Using a large spatula, press as much liquid as you can out of the butter.

Put the butter in a bowl and pour a few cups of cold water over it. Stir, press, and fold the butter, then drain off the cloudy water. Repeat 8-10 times until the water is clear.

Add salt to taste.

Add minced chives or basil to use on vegetables or pasta.  Add chopped peaches, a bit of honey, cinnamon or strawberries for a sweet flavored butter spread.


Enjoy!!!

    🙂   


Okay – NOW it’s time to “panic”

WOW! Where has the time went?!?!?

Only a little more than a week until Christmas!!!!! YIKES!!!

Do you have everything done yet???

Nope.

Me either!!!

In fact, I’ve been so busy with the “day job” that I JUST finished decorating the Christmas Tree!! Like – a few hours ago finished!!! UGH.

At least the presents are “in the works”. Not finished – but at least I’m making progress. That’s something – right????    😉   

However, three of them have actually been “in the works” for almost a year now! I guess that kinda deflates that “making progress” balloon, huh???     🙂   

Going to work before sunrise, and getting home after dark, with a day filled with strenuous activity outdoors (in nasty cold weather) doesn’t leave you very motivated in the evenings to do much! A hot meal, a hot bath and curling up under some warm blankets while calling it a day is about it!!

I’m ready for Spring!!

How about you?????

In the mean time…..

Here’s a quick recipe I thought you might like to try if you are in a hurry for a last-minute get-together:       

Super Simple Cheesecake
Filling:
2 blocks of cream cheese (do NOT use low-fat) – softened
2 cups of powdered sugar (sifted)
16 oz tub of Cool Whip
Crust:
2 1/4 cups finely ground graham cracker crumbs
1/2 cup  sugar
9 Tablespoons butter, melted
3/4 teaspoon ground cinnamon
To make the crust:
Mix your graham cracker crumbs, your sugar, your melted butter, and cinnamon until well blended. Press the mixture into the bottom of a 9 x 13 pan.
To make the filling:
Mix the cream cheese with mixer until smooth. Then add the powdered sugar one cup at a time and mix until smooth. Add in the entire tub of cool whip and  mix until smooth.

****Please do not add items out of this order or your mixture will be lumpy.
Put it in the refrigerator for at least one hour before serving.
When ready to serve:  drizzle with chocolate, or sprinkle with nuts and caramel, or add your favorite pie filling on the top.     🙂   

Have a piece for me!!!

Easy Chicken Pot Pie

Okay – it’s officially that time of year. Cold weather = warm, hearty Comfort Food!!! You know – the kind that warms you up from the inside out. A wonderful thing after spending all day outside in the cold, bone-chilling, wind howling weather.    🙂   

This is one of my son’s favorite foods, and I “developed” this recipe one day when I was in a hurry and had no time, or inclination, to make dinner that night. It has become one of our Go-To recipes, and one that he even has written down to take with him to college. It is perfectly EASY enough for ANYONE (take notice here teenagers and hubbys!), with or without any cooking abilities, to make at a moments notice.

Now, keep in mind – this recipe is custom tailored to a busy, exhausted mom; a college student; or starving man with no time to cook. Which means that there are  no  “Made From Scratch”  parts to this recipe.

GASP!!! SHOCK!!! AWE!! The Horror!! Blasphemy!!

Get over it!   🙂   

We don’t all have the time on a daily basis (if ever) to chop, skin, peel, roll, mix and bake EVERYTHING that we make/cook from scratch. And spending hours getting dinner on the table after a long day is just not my idea of a good time!    😉   

So, here ya go.

Quick. Easy. Hearty. Warm. Filling….. and best of all – it can also use up the previous nights leftovers!

What more could you ask for?    😉   

SHADY’S EASY CHICKEN POT PIE

Pre-heat oven to 350 degrees.

13″ x 9″  Baking Dish, spray with non-stick cooking spray

2 pkgs store-bought ready-made pie crusts (4 crusts total)

4 cups cooked, de-boned, skin free, diced Chicken meat ( approx. 2 cans or 3 leftover chicken breasts +/- )

1 – 1lb. bag of Frozen Mixed Vegetables (do not thaw)

1 large (or 2 small)  cans of Cream Of Chicken Soup (can substitute Cream of Mushroom if necessary)

1/2 to 3/4 cup of milk (depending on how thick you want your filling/gravy)

Garlic Powder, Black Pepper, Paprika to taste (all optional)

Line your baking dish with 2 of the pie crusts (they will overlap in the middle of the dish – this is okay).

Place chicken meat in pan on top of the bottom crusts. Level it out.

Dump bag of Frozen Veggies over top of chicken and level out.

In a small bowl combine the soup and milk to desired thickness, then pour over veggie layer as EVENLY as possible.

Sprinkle pepper, garlic and paprika over top of soup layer – if desired. (I use approx 1/4 tsp. of each spice on ours)

Top dish with the remaining 2 pie crusts, overlapping them slightly in the middle and crimping/sealing the edges all the way around the dish.

Take a fork and poke several holes thru the top of the pie crusts to let the steam escape and prevent overflows.

Place dish on a cookie sheet (just in case of overflow) on CENTER oven rack.

Bake at 350 degrees for 45 – 50  minutes (until crust is golden brown like any good pies should be).    😉   

Pull from oven and let sit for 5 – 10 min (the roof of your mouth will Thank You for this) then serve with biscuits/buttered bread for a great meal!

Recipe easily feeds 1 hungry boy for 2 days – or a family of 4 for 2 meals!

    😉   

Enjoy!

Oh – and please forgive my lack of photographs in this post……. Pot Pie was consumed too quickly for photos the other night.    🙂

Quilting Gremlins and Amish Friendship Bread


Okay, I know that is a weird title for a post – and because of it I must explain for those of you who are not acquainted with the dreaded “Quilting Gremlins”.

The Quilting Gremlins are those nasty little unseen creatures who wander off with things in your sewing room/quilt studio when you are not looking.

Don’t feed them with your things – it gets ugly!!

No – this is not one of them…..just one of the ones who are SUPPOSED to keep them away.

He’s FIRED!!

Just kidding.

Okay. Explanation of situation time….

Yesterday I went looking for a tablerunner I had made so that I could batt, back and finish it for a gift. Where I left it is NOT where it is at!! I’ve looked everywhere for it, and it has just plain disappeared! Gone from the premises! Gremlin food, I presume…..

The GOOD thing that came out of all that searching, however, is that I found a bunch of orphan quilt blocks from a project that I did 4 months or so ago!!

I totally forgot that these even existed!!

I have to make a throw quilt for a special occasion next week – and there were enough already made quilt blocks for me to be able to just sew them together, add a border, and have a quilt done!!! Alleluia!!!

Here, take a look…..

Now, mind you, these are just some of the blocks that I found (placed on my too short design wall)  with the bottom ones laying on my ironing board. But, this gives you an idea of what I am going to be working with.  😉 

This makes me happy, because this just saved me a LOT of time and work!!! I’ll let you know how it turns out.  🙂 

In the mean time, here is a recipe that you are not going to find lying around anywhere. I am not putting pictures of this one up because, well, you don’t need them. Trust me.

This was given to me years ago, and is not generally published/shared often. But, it is the season when you will start looking for the product to be floating around. If you are lucky, someone might give you some of this starter. If you are not so lucky, I’m going to teach you how to make your own – but, SHHHHHHHHHHH……it’s a secret!  🙂  

And “YES”, this actually came from an Amish Lady who was willing to Bless me with the actual recipe!!  🙂   

Amish Friendship Bread Starter


2 cups all-purpose flour

2 cups milk

1 cup + 1 Tblsp sugar

1/3 cup warm water

2 Tblsp. or 2 pkgs. active dry yeast


Sprinkle 1 Tblsp. sugar over the warm water.

Sprinkle yeast over that, and let it stand in a warm place until it doubles in size. (about 10 minutes)

Mix milk, rest of sugar, flour and the above yeast mixture in a plastic or glass container that is about the size of a five-quart ice cream bucket. Stir – using ONLY a wooden spoon/fork, as metal objects will retard the natural growth of the product.

Cover LOOSELY with a plastic cover, or a glass plate so that the product can breath, and expand. (It will double or even triple at times of vigorous rising!!!)

Let stand overnight in a warm place. Next day – refrigerate, covered, and stir each day for 5 (five) days.

On 5th day, divide the starter into 3 (three) 1 cup portions placed into a 1 gallon zipper-type plastic bag. Use 1 of the 1 cup portions to bake for yourself with; give 1 of the 1 cup portions to a friend; save the last 1 cup portion as your starter for your next batch!!!

Starter Usage Directions – for you and friend

Day 1 – Receive starter. Do nothing to it. Leave on counter (or in cupboard) covered for next 10 (ten) days.

Days 2, 3, 4 – Stir well with wooden spoon each morning.

Day 5 – Add 1 cup of sugar, 1 cup of milk, and 1 cup of flour to the starter and stir well.

Days 6, 7, 8, 9 – Stir well.

Day 10 – Add 1 cup of sugar, 1 cup of milk, 1 cup of flour to the starter and mix well. Take out 3 (three) 1 cup portions of the starter (will leave you with approximately 2 cups worth in your container), and place each portion into individual plastic bags for distribution – but be sure to keep 1 of these bags/1 cup portions for YOUR starter for the next batch!!!.


Amish Friendship Bread

Add the following to your 2 cups of starter from above:

3/4 cup vegetable oil

3 eggs

1 cup sugar

2 cups flour

2 tsp. vanilla extract

1 + 1/2 tsp. ground cinnamon

1/2 tsp. baking soda

1/2 tsp. salt

2 tsp. baking powder

Mix all together well, then choose which Add-In you would like to include from below:


ADD INS:   Add 1, or a combination of, any of the following….

2 cups pumpkin, or

2 cups blueberries, or

3 ripe bananas, or

1 cup applesauce, or

1 cup chopped apples, or

1 cup raisins, or

1/2 cup nuts – your choice of variety.


Gently fold-in the ingredient you chose. Place into 2 greased loaf pans and bake at 350 degrees for approximately 55 minutes.

If you prefer to make these into Muffins – Fill greased muffin tins approximately 3/4 full and bake at 400 degrees for 15 to 18 minutes. Will make 2 – 3 dozen muffins.


Now remember – SHHHHHHHH – this is a secret, so keep this starter recipe to yourself, and just smile sweetly when questioned about where/how you got it, and just say “A friend”.  😉 

Enjoy!!

Your friend,

Shady

🙂


Christmas Surprises

Christmas is now less than 48 hours away! All of the last-minute shopping, wrapping, baking, and crafty pressie making should – in theory –  be done by now….in theory! Yet, there always seems to be that last-minute addition to the gift list. A relative who said that they were NOT going to be there, shows up. The unannounced friends, neighbors, friends of friends/relatives, new “significant others” you weren’t aware of, etc., etc., etc…. So, what’s a thoughtful, caring, wonderful, cash strapped, out-of-time, already overwhelmed, slightly stressed person such as yourself to do?


Whip up some quick Gift Jars!! You can generally throw some of these together in a flash with things that you already have on hand. At least this is the best I can come up with until they invent 1-800-SHOP/DELIVER-NOW. These are pressies that are always appreciated – especially by those who are “baking/cooking challenged”, and you’ll be prepared for those unannounced last-minute guests.

***TIP:   If you’re traveling to the family Christmas Party instead of having it at your house this year, pack a few extra of these to take along with you!! Just pop a blank gift tag on them, tie a cute ribbon around the top before you go, and viola! You are da bomb!! Just fill out the gift tag once you get there and know who the unannounced guest is, and you’ll never be caught without a gift for Aunt Edna (who nobody knew was coming ahead of time) again!!  But, beware – this will make you the envy of all of those caught unawares, and suddenly you will be Aunt Edna’s favorite!!! If that scenario is okay with you – then proceed as planned, and be prepared for the Kudos!!


**IMPORTANT**  Please make sure that you tie a copy of the baking/finishing directions to the jar for the recipient (or at least a copy of the whole recipe so they can know what’s in their jar)!!! You don’t want them throwing your gift away because they don’t know how to bake it!   🙂
 

**Quick Note**  If you don’t have the chocolate chips called for in a couple of these recipes, then substitute in M&M’s or Reeses Pieces, whatever you have on hand will work and add color to the jar!


Cowboy Cookie Mix In A Jar Recipe

 21 Servings  Prep  : 20 min. + chilling Bake: 15 min./batch
Ingredients
1-1/3 cups quick-cooking oats
1-1/3 cups all-purpose flour
1 teaspoon baking powder
1 teaspoon baking soda
1/4 teaspoon salt
1/2 cup chopped pecans (Walnuts will work in a pinch)
1 cup (6 ounces) semisweet chocolate chips
1/2 cup packed brown sugar
1/2 cup sugar

Additional Ingredients:
1/2 cup butter, melted
1 egg, lightly beaten
1 teaspoon vanilla extract

Directions
Pour oats into a wide-mouth 1-qt. glass container with a tight-fitting lid. Combine the flour, baking powder, baking soda and salt; place on top of oats. Layer with pecans, chocolate chips, brown sugar and sugar, packing each layer tightly (do not mix). Cover and store in a cool dry place for up to 6 months.
Yield: 1 batch.

To prepare cookies: Pour cookie mix into a large bowl; stir to combine ingredients. Beat in butter, egg and vanilla. Cover and refrigerate for 30 minutes.
Roll into 1-in. balls. Place 2 in. apart on greased baking sheets. Bake at 350° for 11-13 minutes or until set. Remove to wire racks to cool.
Yield: about 3-1/2 dozen.


Christmas Cookies in a Jar Recipe (or Oatmeal Raisin Cookies)
18 Servings  Prep: 15 min. + chilling  Bake: 10 min.
Ingredients
1/3 cup sugar
1/3 cup packed brown sugar
3/4 cup all-purpose flour
1/2 teaspoon baking powder
1/8 teaspoon baking soda
1/8 teaspoon salt
1 cup quick-cooking oats
1 cup orange-flavored dried cranberries (can substitute raisins in a pinch)
1 cup vanilla or white chips (optional – if you delete these and replace the cranberries with raisins you have a great Oatmeal Raisin Cookie)

ADDITIONAL INGREDIENTS:
1/2 cup butter, melted
1 egg
1 teaspoon vanilla extract

Directions
In a 1-qt. glass jar, layer the sugar and brown sugar, packing well between each layer. Combine the flour, baking powder, baking soda and salt; spoon into jar. Top with oats, cranberries and chips. Cover and store in a cool dry place for up to 6 months.

To prepare cookies: Pour cookie mix into a large bowl; stir to combine. Beat in butter, egg and vanilla. Cover and refrigerate for 30 minutes.

Drop by the tablespoonfuls 2 in. apart onto ungreased baking sheets. Bake at 375° for 8-10 minutes or until browned. Remove to wire racks to cool.
Yield: 3 dozen.


Spicy Oatmeal Cookie Mix Recipe

22 Servings  Prep: 15 min.   Bake: 10 min./batch
Ingredients
1 cup all-purpose flour
1 teaspoon ground cinnamon
3/4 teaspoon baking soda
1/4 teaspoon salt
1/8 teaspoon ground nutmeg
1/2 cup packed brown sugar
1/2 cup sugar
1 cup old-fashioned oats
1 cup swirled milk chocolate and caramel chips
1/2 cup flaked coconut

ADDITIONAL INGREDIENTS:
1/2 cup butter, softened
1 egg
3/4 teaspoon vanilla extract

Directions
In a small bowl, combine the first five ingredients. In a 1-qt. glass jar, layer the flour mixture, brown sugar, sugar, oats, chips and coconut, packing well between each layer. Cover and store in a cool, dry place for up to 6 months.
Yield: 1 batch (4 cups).

To prepare cookies: In a large bowl, beat the butter, egg and vanilla. Add cookie mix and mix well. Drop by rounded teaspoonfuls 2 in. apart onto ungreased baking sheets.

Bake at 350° for 9-11 minutes or until golden brown. Cool for 2 minutes before removing to wire racks.
Yield: about 3-1/2 dozen.

These are just a couple of basic Jar Cookie recipes to get you started, but when you’re pressed for time you don’t want to be sorting thru 50 recipes trying to find a simple jar recipe! So – enjoy, good luck and here’s wishing you a very Merry Christmas!!

Busy, Busy, Busy……


The Sunrise and Sunset Photo Album is uploaded, Crock-Pot Recipes have a page, probably 20 more Christmas Cookie recipes have been added, and last but not least – the Quick Breads/Cakes/Muffins page has been added for those who asked!! 🙂 The “candy/treat” page is good to go, and a few more “body scrub” recipes have been added. Hopefully things will now be easier for you to find and enjoy with less searching (however, I do have the “search” button on the upper right of the pages if you need it), and several more pages are in the works to get more of the quilty/crafty things uploaded for you to peruse. I know that this is not one of my normal posts – I’ll do that later today – but I needed to let everyone know, who asked for the above changes, that it has been done. 🙂 Enjoy, and I’ll talk to you more later today!! 

Happy Sunday! 

Shady, and Company (Muckrunners)